How to Fill In Sparse or Thin Eyebrows with Makeup
The short answer
Fill sparse brows with light, hair-direction strokes using a fine pencil or angled brush.
Why Brow Filling Looks Natural or Artificial: The Core Principles
The difference between filled brows that look real and filled brows that read as makeup is almost entirely in technique, not product. The three principles that determine the outcome:
1. Stroke direction. Every mark you make should travel in the direction natural brow hairs grow — which, in most brows, is upward-and-outward from the head, angling more lateral and slightly downward toward the tail. A mark that crosses hairs rather than following them reads as a line, not a hair.
2. Pressure variation. More pressure = more pigment = more visible stroke. Light, feathery pressure creates fine marks that blend into real hairs; heavy pressure creates bold lines that contrast with them. The brow head needs almost no pressure; the arch and tail can be slightly firmer.
3. The spoolie step. Combing through the brow with a spoolie after filling is not optional — it is what makes pencil strokes look like hairs. Unblended product looks applied; blended product looks grown.
Product Types: Pencil, Powder, and Pomade
Each format delivers a different finish and suits different brow situations.
Brow Pencil
Best for: Hair-stroke precision in genuinely sparse gaps; beginners learning brow filling technique.
A micro-precision or ultra-fine brow pencil allows the most realistic individual hair-stroke mimicry. The thin tip deposits a fine line that, with the right angle and light pressure, is indistinguishable from a real hair at conversational distance.
How to use:
- Hold the pencil at a low, nearly horizontal angle to the face — this produces a thin, tapered stroke rather than a blunt dot
- Work in 1–2 cm strokes starting at the root of the stroke and lifting off at the tip
- Never press hard at the start of a stroke — the heaviest point of a pencil mark is always where you first touch the skin
Shade selection: Choose a shade that matches (or for dark brows, is one shade lighter than) your actual brow hairs. For very sparse brows where the skin is visible, a shade slightly lighter than the brow hairs prevents obvious contrast between the drawn strokes and the skin.
Limitations: Pencil-only filling works well for brows that have some existing density with gaps; for very bare brows, pencil alone tends to look lined rather than filled. Pair with powder.
Brow Powder
Best for: A soft, diffuse fill that adds the visual density of shadow; layering under or over pencil for a natural result.
Brow powder is applied with an angled brow brush and creates a matte, pigmented shadow effect beneath and between the brow hairs. Because it is a diffuse, non-linear product, it reads as shadow rather than individual strokes — which is actually closer to how full brows look from a distance (a soft mass of color, not a collection of visible lines).
How to use:
- Load an angled brush by tapping lightly in the powder and tapping off excess on the back of your hand
- Sweep along the lower border of the brow in the direction of growth, from arch to tail
- Add a lighter pass along the upper border to define the top line
- Fill the center more softly
- Blend immediately with a spoolie
Two-shade technique: Many professional brow kits contain two powders — a lighter and a darker shade. Using the lighter shade from the brow head to arch and the darker shade from arch to tail creates natural-looking depth that mimics how brow hairs graduate in density.
Limitations: Powder alone on very sparse brows can look patchy and settle into skin texture. A pencil base for the sparsest gaps, followed by powder over the whole brow, gives the most realistic layered result.
Brow Pomade
Best for: Maximum definition, bold brow looks, oily skin, or high-longevity wear (waterproof formulas); the most precise edge-lining.
Pomade is a waxy, pigmented cream applied with an angled brush. It provides the boldest, most defined result and typically offers the longest wear — many formulas are genuinely waterproof once dry.
How to use:
- Dip an angled brow brush lightly into the pomade — less product is more; overloaded brushes create chunky marks
- Outline the lower brow border first to establish the shape, then the upper border
- Fill the center with light strokes
- Soften with a spoolie immediately while the pomade is still fresh — pomade dries quickly and is very difficult to blend once set
- Use a concealer or foundation slightly lighter than your skin tone along the lower edge of the defined brow to sharpen the shape and clean up any edges
Limitations: Pomade gives the most "makeup-done" look of the three formats. For a natural, no-makeup-brow result, a lighter pencil or powder will read more authentically. Pomade is also the least forgiving — mistakes are harder to correct than with powder.
Shade Matching: The Most Important Decision
A brow product in the wrong shade is the fastest route to an artificial result. General rules:
| Hair Color | Recommended Brow Shade |
|---|---|
| Dark brown / black | One shade lighter than the brow — medium brown or soft taupe |
| Medium brown | Match exactly, or go one shade lighter for a softer look |
| Light brown / dirty blonde | Match the brow color or one shade darker |
| Blonde | One to two shades darker than brow hairs — blonde on blonde disappears |
| Red / auburn | Auburn or reddish-brown; avoid cool-toned grays |
| Gray / white | Cool taupe or light gray; avoid dark colors that contrast harshly |
Undertone matters: Brow shades with a warm (golden, reddish) undertone suit warm-toned hair; ashy, gray, or cool-brown shades suit cool-toned or blue-black hair. A technically well-applied brow in the wrong undertone can look disconnected from the hair color above it.
Filling for Different Brow Sparsity Levels
Lightly Sparse (a few gaps, overall brow present)
A fine pencil used at low angle in the direction of growth fills gaps convincingly. A quick spoolie blend makes this look natural in under two minutes. Finish with a clear brow gel.
Moderately Sparse (noticeable thinning, skin visible in sections)
Layer pencil hair-strokes in the sparse areas, then apply a light powder fill over the entire brow to create a uniform base that ties filled and dense areas together. The powder fills the visual space between strokes and makes the pencil work less obvious.
Heavily Sparse (brow is mostly bare in areas)
This scenario requires a more architectural approach:
- Use pencil to create the baseline shape — drawing the shadow of where hairs would be, lightly
- Layer brow powder over the pencil for depth and diffusion
- Use an angled brush with pomade to define the brow edges cleanly
- Finish with spoolie blending and brow gel
For brows that are severely sparse due to medical hair loss, alopecia, or permanent follicle damage, makeup alone provides a good result but microblading is worth considering for a longer-lasting, lower-daily-effort solution.
Common Mistakes and How to Avoid Them
Drawing a solid line instead of strokes. The single most common mistake: one continuous line from head to tail, which reads as obviously artificial. All filling should be done in short individual strokes that start at a hair root and lift off at the tip.
Starting too close to the nose bridge. Over-filled medial brow heads look heavy and can make the eyes appear closer together. Map your start point (above the outer nostril edge) before filling and keep the head very light.
Filling the top edge of the brow. The upper brow line should almost never be filled — it is the natural boundary. Filling above it creates a shelf effect that looks drawn-on. Fill below the natural line to add apparent thickness.
Using too dark a shade. This is especially common in brunettes who use a product matching their hair rather than their lighter brow hairs, or in anyone attempting to match drugstore product packaging to their hair rather than to the actual brow.
Skipping the spoolie blend. The spoolie is the essential finishing step. Without it, pencil strokes remain visible as strokes rather than dissolving into the brow.
Over-arching when filling the arch area. The arch is tempting to over-emphasize during filling — it is the most structurally dramatic part of the brow. Fill the arch area with a lighter hand and let the spoolie blend soften the peak rather than trying to paint a sharp angle.
Brow Gel: The Step That Locks Everything In
A brow gel is the final essential step — it is not optional if you want your filled brow to last through the day. Apply by brushing the spoolie wand through the brow in the direction of growth, starting at the head and sweeping toward the tail with upward movement at the arch.
Clear gel: Locks and holds without adding color; works over any pencil/powder/pomade combination; good for naturally full-colored brows that just need the fill locked in.
Tinted gel: Adds an additional layer of color while holding; useful for brows where the fill needs support across the whole brow, or where the tint itself provides enough coverage without needing a separate pencil step.
Strong-hold vs. flexible hold: Strong-hold gels give a more feathery, structured brow (the laminated look); flexible-hold gels give a softer, groomed brow that moves more naturally.
For the full shaping context — how to determine your brow architecture before filling — see eyebrow-shaping-guide. For matching your brow fill approach to your face shape, see eyebrow-for-face-shape.
Step by step
- 1
Groom and assess
Use a clean spoolie brush to comb brow hairs upward and outward into their natural growth direction. This reveals true density, shows exactly which areas are sparse, and ensures you are filling accurately rather than covering flat or misaligned hairs.
- 2
Map your three anchor points
Mark the brow start (above the outer nostril edge), arch peak (above the lateral iris), and tail end (where a diagonal from nostril through outer eye corner reaches the brow). These anchors define the shape you are filling in — do not fill outside them.
- 3
Select and shade-match your product
Choose a pencil, powder, or pomade in a shade matching your brow hairs. For dark brows, go one shade lighter to avoid harsh contrast. For light or fair brows, go one shade darker for definition. Ashy or cool-toned shades suit cool hair tones; warm or taupe shades suit warm hair tones.
- 4
Fill the arch and tail first
Start at the highest point of the arch and work toward the tail with light, short strokes in the direction of hair growth. Use minimal pressure and build gradually — it is much easier to add product than to remove an over-applied line. The tail should be the most defined part; taper to a clean point rather than blunting it.
- 5
Fill sparse inner sections lightly
From the arch, work back toward the brow head with an even lighter hand. The medial head of the brow — the part closest to the nose — should always be the softest, least filled area. Heavy filling at the brow head looks unnatural and exaggerates the medial brow width. Use a light, fanning motion to add color without hard lines.
- 6
Blend with a spoolie
While the product is fresh, comb a clean spoolie through the brow in the direction of growth. This is the step most people skip and the one that makes the biggest difference: it blends filled areas seamlessly into natural hairs, eliminates harsh pencil lines, and creates the diffused, hair-like appearance that reads as natural.
- 7
Add powder fill if needed
For very sparse brows or a deeper shadow effect, use an angled brow brush loaded lightly with brow powder to fill the area beneath the lower brow line. This creates a shadow that makes the brow appear thicker from below without requiring more individual strokes. Sweep lightly and blend immediately.
- 8
Set with brow gel
Apply a clear or tinted brow gel over the entire brow, brushing upward and slightly outward. This locks the filled hairs and natural hairs in the same direction, integrates the makeup with the real hairs, and significantly extends wear throughout the day.
Products that fit this guide
Picked by code from each product's full ingredient list.

Catrice
Brow Fix Shaping Wax
brow product · 1 g · 11 ingredients
- Fragrance-free
- No essential oils

Catrice
Drunk'n Diamonds Eyeshadow Stick
eyeshadow · 2.5 g · 17 ingredients
- Fragrance-free
- No essential oils
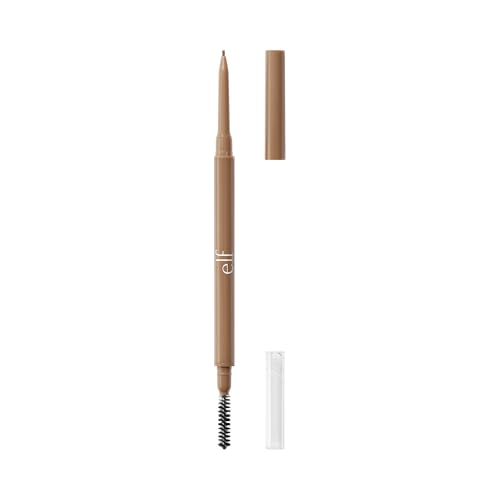
e.l.f.
Micro-Fine Brow Pencil
brow product · 0.03 g · 16 ingredients
- Fragrance-free
- No essential oils
- With vitamin E

Essence
All Eyes On Me Waterproof Mascara
mascara · 8 ml · 20 ingredients
- Fragrance-free
- No essential oils
- With glycerin
Frequently asked questions
What is the most natural-looking way to fill in eyebrows?
The most natural result comes from a combination of a micro-fine pencil for sparse gap strokes and a brow powder to unify the fill, with thorough spoolie blending after each product. The key variables are shade (typically one tone lighter than your brow hairs for dark brows), stroke direction (following natural hair growth, not crossing it), light pressure, and working from arch toward both the tail and the head — keeping the brow head the softest, least-filled section. The spoolie blend step is what transforms strokes into something that reads as real hair rather than pencil marks.
What product is best for very sparse eyebrows?
For genuinely sparse brows with significant bare skin visible, a layered approach works best: fine pencil hair strokes in the sparse areas (building the architecture), brow powder swept over the entire brow for a unifying shadow fill, and a tinted gel to set. This combination creates depth and realism that no single product format achieves alone. Pomade can be added for edge definition if a bolder look is desired. For severe sparsity due to medical hair loss or follicle damage, consider whether a semi-permanent solution like microblading is appropriate alongside or instead of daily filling.
Should I use a pencil or powder to fill my eyebrows?
Use a pencil for precise hair-stroke work in genuinely sparse gaps, and powder for an overall soft fill that adds visual density and ties the pencil work and real hairs together. For lightly sparse brows, pencil alone suffices. For moderately to heavily sparse brows, both together produce the most realistic result. Pomade is the third option for maximum definition, longevity, and waterproof wear — best for oily skin or when you need the brow to last through high-humidity or high-activity situations.
What shade of brow product should I use?
Match the shade to your actual brow hairs, not your hair color. Brow hairs are typically lighter and less saturated than scalp hair. For dark brown or black brows, choose a medium brown or cool taupe — one shade lighter avoids harsh, drawn-on contrast. For light brown or blonde brows, go one shade darker than the brow hairs to add visible definition. For red or auburn brows, use a warm brown or auburn shade and avoid cool-toned grays, which will look disconnected from your hair.
How do I stop my eyebrow fill from smudging or fading?
Set the finished brow with a strong-hold brow gel over any pencil, powder, or pomade. Avoid touching the brow area throughout the day. For very long-wear needs (oily skin, humid climate, athletic activity), use a waterproof pomade or waterproof pencil as the base layer — these resist oil and moisture significantly better than standard formulas. Primer on the brow area before filling also extends wear by giving product something to adhere to.
Sources
- 01Techniques of Eyebrow Lifting: A Narrative Review — PubMed Central / Plastic and Reconstructive Surgery Global Open, 2020-03-01. Eyebrow shape, position, and density are integral to facial aesthetics; the visual impression of brow fullness and arch is a recognized component of facial harmony in aesthetic medicine.
- 02Aesthetic analysis of the ideal eyebrow shape and position — PubMed / European Archives of Oto-Rhino-Laryngology, 2014-10-28. Eyebrow shape and density contribute to perceived facial attractiveness and facial balance; the medial brow head should be softest while the arch and tail carry the primary shaping weight.