How to Do a Cut Crease: Step-by-Step for Every Eye Shape
The short answer
Blend a dark matte shade into the crease.
What Is a Cut Crease?
A cut crease is an eye makeup technique that creates a visually sharp, defined boundary between the darker shadow in the eye socket and a contrasting color on the lid. Instead of blending the crease shade softly down onto the lid — as in a standard smoky eye — the cut crease uses concealer or a skin-tone shadow to "cut" a clean line at the top of the moveable lid, leaving a precise edge.
The result: the eye appears more open, the lid color is displayed at higher intensity, and the overall look reads as polished and intentional rather than diffused and soft.
A cut crease is not a single rigid look — it exists on a spectrum:
| Variation | Description | Difficulty |
|---|---|---|
| Half-cut crease | Outer half of lid cut and defined; inner half blended softly | Beginner–intermediate |
| Full-cut crease | Sharp cut along the entire lid from inner to outer corner | Intermediate |
| Double-cut crease | Two defined crease lines for a graphic, editorial effect | Advanced |
| Reverse cut crease | Dark color on the lid; lighter shade on the brow bone (inverted) | Advanced |
For beginners, the half-cut crease is the recommended starting point — it is more forgiving, more wearable, and easier to correct if placement goes wrong.
What You Need
Essential:
- Eye primer (tacky/grip formula preferred)
- Matte dark or mid-tone eyeshadow for the crease
- Full-coverage concealer (one to two shades lighter than skin tone, or a skin-tone match)
- Lid color (shimmer, matte, or foil — your choice)
- Small flat shader or concealer brush
- Fluffy dome-shaped blending brush
- Pencil or detail brush
Optional but useful:
- Waterproof pencil eyeliner (to sketch the cut line before applying shadow)
- Translucent powder (to set the concealer and prevent migration)
- Q-tips and micellar water (for cleanup and precision sharpening)
- Setting spray
Step-by-Step: The Classic Cut Crease
Step 1: Prime the Eye
Apply eye primer across the entire lid from lash line to brow bone. For a cut crease, grip is critical — the sharp line depends on shadow staying exactly where it is placed. A cream-based primer with a tacky texture gives the most transfer-resistant base. Allow the primer to fully set, about 30 seconds.
Optionally, dust a translucent or neutral matte powder over the primed lid to create a smooth, dry surface that makes blending more controlled.
Step 2: Apply a Transition Shade
Using a fluffy blending brush, apply a light to mid-tone matte shadow above and slightly into the crease. This is the transition shade — it softens the boundary between the dark crease color and the brow bone. Apply in windshield-wiper strokes, keeping the color concentrated in the upper crease area and fading up toward the brow bone.
Step 3: Define the Crease with a Dark Matte Shade
Load a small tapered crease brush or the tip of the fluffy blending brush with a deeper, dark matte shadow. Work it directly into the socket line and blend slightly outward. Build the depth gradually — dark shadow is easy to deepen, difficult to lighten once heavily loaded.
Critical: Do not blend this shadow down onto the moveable lid. The cut crease only works if the dark shade stays in the crease and above, leaving the lid free for the "cut."
At this stage, the look will resemble a defined smoky crease with an undefined lid. That is correct — the next step creates the cut.
Step 4: Sketch the Cut Line (Optional)
For precision, take a waterproof pencil eyeliner and lightly draw the line where you want the cut — a gentle curve following the natural upper lid shape, sitting at the top of the moveable lid. This acts as a guide when you apply concealer. The line should be thickest at the outer corner, tapering thinner toward the inner corner.
Sketching is optional but helpful for beginners. Experienced applicators often skip directly to concealer.
Step 5: Cut the Crease with Concealer
This is the technique's defining step. Load a small flat shader brush or flat concealer brush with a full-coverage concealer — either a skin-tone match or one to two shades lighter (lighter creates a higher-contrast, more dramatic cut).
Using the edge of the flat brush, press the concealer onto the moveable lid in a semi-circle shape, following the curve of the lid. The straight edge of the brush creates the sharp line at the top of the cut. Work from the outer corner inward.
Key technique detail: Use pressing motions, not dragging strokes. Dragging softens the line. Pressing and building in thin layers keeps the edge crisp.
If you sketched a guide line in Step 4, use it as your upper boundary — pack the concealer up to but not over the line.
Step 6: Set the Concealer
Lightly dust a translucent powder or a matte shadow that matches the concealer over the cut section. This locks the concealer in place and prevents it from migrating into the dark crease color as the day progresses. Use a small flat brush and press lightly rather than sweeping, which would disturb the edge.
Step 7: Apply the Lid Color
Pack your chosen lid shade onto the concealed area using a flat shader brush. Shimmer shades read dramatically on this prepared surface — the concealer underneath maximizes their pigment and reflectivity. Matte shades create a clean, graphic look. Foil or liquid shades deliver the most intense color payoff.
Apply in pressing and patting motions from the inner corner outward. Avoid bringing the lid shade above the cut line.
Step 8: Clean Up Edges
Wrap a Q-tip in micellar water and carefully run it along the cut line to sharpen any areas where concealer or shadow has bled. A clean, damp Q-tip can also soften the lower edge of the crease shadow. This cleanup step transforms a good cut crease into a great one.
Step 9: Finish the Look
Apply a highlight shade to the brow bone — a matte or subtle shimmer shade one to two tones lighter than your skin tone. Apply a small amount of the darkest crease shade to the outer corner of the lower lash line with the pencil brush. Add a touch of inner corner highlight. Apply mascara or false lashes to complete.
Modifying the Technique for Your Eye Shape
Hooded Eyes
Hooded eyes present the biggest challenge for a cut crease because the hood covers part of the moveable lid when the eye is open. The standard technique applied within the natural crease produces a look that is invisible on open eyes.
The adjustment: Do all crease placement and cut line work with eyes open. Draw and blend the crease shade above your natural socket line — sometimes a full centimeter above it — so the dark shadow remains visible. Similarly, place the cut line above the natural crease. The skin above the natural socket can act as a "false crease" canvas.
Additional tips:
- Use a cream-based eye primer specifically formulated to prevent transfer — hooded lids have minimal crease space and any migration ruins the definition
- Apply a lighter concealer on the hood itself (the overhanging skin) to visually lift the lid before creating the cut
- Curl lashes thoroughly; on hooded eyes, lashes are often pushed straight by the hood and mascara alone does not open the eye sufficiently
Monolid Eyes
Monolid eyes have no visible natural crease. The cut crease on a monolid creates a crease where none naturally exists.
Apply the dark matte shadow across the upper portion of the lid, above the area where the crease would be if it were visible. Create the cut line by pressing concealer onto the lower portion of the lid. This draws a boundary across a flat canvas rather than following a socket line.
Because the canvas is flat and open, monolid cut creases can accommodate bolder, more graphic interpretations — the look has gone viral on this eye shape specifically because the entire lid is visible and the contrast reads dramatically.
Do all application with eyes open. The entire lid is the display area on a monolid; there is no hood to contend with, which makes the look easier to see while building but requires careful judgment about proportions.
Deep-Set Eyes
Deep-set eyes have a naturally prominent brow bone that casts a shadow over the lid. The crease tends to be naturally defined, sometimes overly so.
For a cut crease on deep-set eyes, do not follow the natural socket depth — this often creates a look that appears too heavy or overly recessed. Instead, draw a "false crease" line slightly lower than the natural socket, keeping the crease color on the more prominent upper brow bone area. A light shade on the actual moveable lid — with the cut separating it from a softly blended mid-tone — creates a more flattering balance, bringing the eye forward visually rather than deepening it further.
The Half-Cut Crease: The Beginner-Friendly Version
If the full cut crease feels like too much precision for a starting point, the half-cut crease is the correct step. It involves:
- Blending the dark crease shade across the full crease, from corner to corner
- Applying the concealer cut only on the outer half of the lid (from the center to the outer corner)
- Leaving the inner half of the lid softly blended without a sharp cut line
The result is a look that has the drama and definition of a cut crease on the outer eye while remaining softer and more wearable at the inner corner. Most wearers find this version more flattering for day looks and less technically demanding to execute.
Common Mistakes
Blending the dark shade onto the lid before cutting. Once the crease color bleeds onto the lid, the concealer must work harder to cover it and the edge will be less clean. Keep dark shadow strictly in the socket and above during Step 3.
Using a blending sponge for the cut. Sponges are designed to blend and soften — the opposite of what a cut crease needs. A flat brush pressed firmly gives a defined edge; a sponge will always soften it.
Skipping the concealer set. Unsetting the concealer with powder means it will crease into the dark shadow within hours, erasing the cut line you spent time creating.
Forgetting to work with eyes open (hooded eyes). This is the single reason most hooded-eye cut crease attempts fail. Everything looks correct on a closed lid and is invisible on an open one.
Dragging concealer rather than pressing. The sharp line is built through pressing motions. Any dragging smears the boundary.
How to Relate the Cut Crease to Other Eye Looks
The cut crease sits at the more defined end of the eyeshadow spectrum. Once you are comfortable with this technique, the underlying skills — precise shadow placement, controlled application, cleanup — transfer directly to:
- Smoky eye: the same three-shade structure without the concealer step; everything is blended rather than cut
- Halo eye: shimmer on the center of the lid, dark at both inner and outer corners; no hard cut line required
- Graphic liner looks: precise application and cleanup skills from the cut crease are directly transferable to geometric liner
For a comprehensive foundation in the underlying technique, see Eyeshadow for Beginners first.
Step by step
- 1
Prime and prep the lid
Apply eye primer with a tacky, grip-oriented formula across the full lid from lash line to brow bone. Allow 30 seconds to set. For extra blendability, dust a translucent or neutral matte powder over the primed lid with a clean fluffy brush.
- 2
Apply a transition shade to the brow bone
Using a fluffy dome brush and a light to mid-tone matte shadow, blend a transition shade into the upper crease and toward the brow bone using windshield-wiper strokes. This softens the line between the dark crease and the bare brow bone.
- 3
Build depth into the crease with a dark matte shade
Using a tapered crease brush or the tip of the fluffy brush, work a dark matte shade into the socket line and blend slightly outward and upward. Do not bring this shade down onto the moveable lid — keep it strictly in and above the crease. Build gradually in layers.
- 4
Sketch the cut line (optional guide step)
Take a waterproof pencil eyeliner and lightly trace the shape of your intended cut — a gentle curve at the top of the moveable lid, thicker at the outer corner and tapering inward. This acts as a guide for the concealer step. Skip if you are comfortable working freehand.
- 5
Cut the crease with concealer
Load a small flat shader or concealer brush with full-coverage concealer. Using the straight edge of the brush, press the concealer onto the moveable lid in a semi-circle shape, building up to but not over the cut line. Use pressing — never dragging — motions to maintain a crisp edge. Work in thin layers.
- 6
Set the concealer with powder
Lightly press a translucent powder or matte skin-tone shadow over the concealed lid with a small flat brush. This locks the concealer in place and prevents migration into the dark crease color.
- 7
Apply lid color
Pack your chosen lid shade (shimmer, matte, or foil) onto the concealed area with a flat shader brush, using pressing motions from the inner corner outward. Keep the color below the cut line. Shimmer and foil shades read most dramatically on the concealer base.
- 8
Clean up the cut line
Wrap a Q-tip in micellar water and run it carefully along the cut line to sharpen any edges where concealer or shadow has bled. A clean Q-tip can also be used to soften the lower edge of the crease shadow if needed. This step sharpens the finished look significantly.
- 9
Finish with highlights, liner, and lashes
Apply a brow-bone highlight shade in a matte or subtle shimmer. Add the darkest crease shade to the outer corner of the lower lash line with a pencil brush. Dab an inner-corner highlight. Apply mascara or false lashes to complete the look.
Products that fit this guide
Picked by code from each product's full ingredient list.

Catrice
Brow Fix Shaping Wax
brow product · 1 g · 11 ingredients
- Fragrance-free
- No essential oils

Catrice
Drunk'n Diamonds Eyeshadow Stick
eyeshadow · 2.5 g · 17 ingredients
- Fragrance-free
- No essential oils
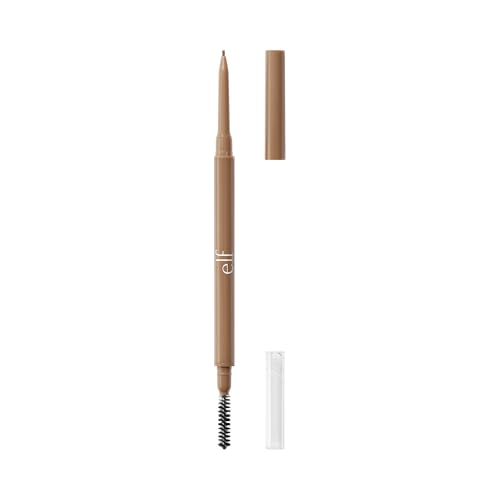
e.l.f.
Micro-Fine Brow Pencil
brow product · 0.03 g · 16 ingredients
- Fragrance-free
- No essential oils
- With vitamin E

Essence
All Eyes On Me Waterproof Mascara
mascara · 8 ml · 20 ingredients
- Fragrance-free
- No essential oils
- With glycerin
Frequently asked questions
Is the cut crease technique still popular and wearable in 2026?
Yes — the cut crease remains a foundational technique in professional and editorial makeup, and it has sustained consistent search interest since the mid-2010s. The wearability depends on the variation: a half-cut crease with soft, neutral tones reads as a polished everyday look; a full cut crease with high-contrast shades reads as evening or editorial. The technique itself is a permanent part of the eye makeup repertoire precisely because it works on almost every eye shape when modified correctly.
Why does my cut crease look blurry or undefined by the end of the day?
The most common causes are: (1) skipping or inadequately setting the concealer with powder — unsetting concealer migrates into the dark crease shadow and softens the boundary; (2) using an eye primer that is not tacky enough to grip the shadow in place; (3) applying too thick a layer of concealer in one pass, which shifts more easily than thin, built-up layers. Fix: set all cream products with powder and use a tacky, grip-focused primer.
Can I do a cut crease on hooded eyes?
Yes, with placement adjustments. The natural crease on a hooded eye is not the correct reference point for the cut — it sits too low and disappears under the hood when the eye is open. Apply all shadow and the cut line above the natural socket, working with your eyes open so you can see the actual visible canvas. Many makeup artists place the cut line a full centimeter or more above the natural crease on hooded eyes. An eye primer with strong transfer-resistance is essential because hooded eyes have limited crease space and any product migration ruins the definition.
What is the difference between a cut crease and a smoky eye?
A smoky eye blends all transitions — there are no hard lines and the darker crease color fades smoothly onto the lid. A cut crease deliberately creates and maintains a sharp boundary between the dark crease shade and the lid color, using concealer as the cutting element. The underlying structure (transition shade, crease shade, lid color) is the same; the execution diverges at the blending step.
Do I need concealer, or can I use a skin-tone eyeshadow to cut the crease?
A full-coverage concealer gives the cleanest, most opaque result because it fully blocks the dark shadow beneath. A matte skin-tone eyeshadow can work if the crease color is not too dark — it is more forgiving and easier to blend, making it a reasonable option for beginners or for a softer version of the technique. For high-contrast cuts (very dark crease, very light lid), concealer is necessary because powder shadow alone does not fully block a deeply pigmented crease shade.
Sources
- 01Cut Crease Eyeshadow: How to Get the Look in 7 Easy Steps — Makeup.com by L'Oréal. Defining the crease with a dark shadow and cutting through it with concealer on a flat brush is the core cut crease technique; concealer sets the stage for a dramatic lid color and covers shadow fallout on the lid.
- 02The Best Cut Crease Eye Makeup Tutorial for Hooded Eyes — Makeup.com by L'Oréal. Hooded eyes require cutting above the natural crease, using a tacky primer to prevent transfer, and applying makeup with eyes open so placement reflects what is visible when the eye is open.
- 03How to Do a Cut Crease: Step-by-Step Guide From Experts — IPSY. The cut crease technique uses a flat brush with concealer to create the cut line; a pencil eyeliner guide sketch is recommended for precision; the look is highly adaptable to all eye shapes including monolids.
- 04How to Apply Eyeshadow for Your Eye Shape — Makeup.com by L'Oréal. Eye shape dictates placement: hooded eyes benefit from placement above the natural crease; monolids use a gradient from lash line upward; almond eyes support standard application without modification.
- 05Eye Cosmetic Safety — U.S. Food & Drug Administration (FDA). The FDA restricts color additives approved for the eye area; cosmetic products must declare color additives on labels; certain pigments approved for general cosmetics are not approved for the eye area.