Eyeshadow for Beginners: How to Blend, Apply & Build Color
The short answer
Prime your lids, apply a light base shade across the lid.
Start Here: What You Actually Need
Eyeshadow has a reputation for being complicated, but the core technique is straightforward once you understand three things: preparation, placement, and blending. You do not need a 30-pan palette or a collection of ten brushes. You need a primer, three brushes, and a basic understanding of where light and shadow should go on your specific eye shape.
This guide walks through each step in order, from choosing your first eyeshadow to finishing the look.
Step 1: Prime Your Lids
Eye primer is the single most important prep step in any eyeshadow routine. Without it, eyeshadow migrates into the crease, fades, and can disappear entirely within a few hours — especially in warm weather or for anyone with oily lids.
What eye primer does:
- Creates a smooth, slightly tacky surface for shadow to grip
- Neutralizes the natural skin tone of the lid so colors appear more true-to-pan
- Prevents oils from breaking down the shadow and causing creasing
- Extends wear time significantly — often doubling or tripling it
How to apply it: Dispense a pea-sized amount onto your ring finger (the lightest-pressure finger) and pat it across the entire lid from lash line to brow bone. Allow it to set for 20–30 seconds before applying shadow. If you do not have a dedicated eye primer, a small amount of long-wear concealer works as a reasonable substitute — it intensifies pigment but does not hold as effectively as a formulated primer.
Setting the primer: For an even smoother base — particularly helpful if you are new to blending — lightly dust a neutral matte shadow or translucent powder over the primed lid. This creates a dry, powdery surface that makes it easier to blend shadows seamlessly.
Step 2: Know Your Three Essential Brushes
You can build every classic eyeshadow look with three brushes. Investing in good-quality versions of these three is more valuable than owning ten mediocre ones.
| Brush | Shape | What It Does |
|---|---|---|
| Flat shader brush | Dense, flat, paddle-shaped | Packs pigment onto the lid; press, do not sweep |
| Fluffy blending brush | Dome-shaped, soft, loose bristles | Diffuses and softens crease color |
| Pencil brush | Small, tapered, dense | Details the outer corner, inner corner, lower lash line |
Technique notes:
- Use the flat shader in pressing and patting motions — sweeping drags the shadow across the lid and reduces pigment intensity.
- Use the fluffy blender in windshield-wiper strokes (side to side) along the crease — not circular motions, which muddy the colors.
- Tap excess shadow off each brush before applying; this reduces fallout (powder that drops onto the under-eye area).
Step 3: Build the Basic Three-Shade Look
This is the foundational structure behind virtually every wearable eyeshadow look — from a soft everyday wash to a dramatic evening eye. It uses three shades: a light, a mid-tone, and a dark.
Light shade: the lid base
Load your flat shader brush with the lightest shade in your palette (close to your skin tone or slightly lighter). Pack it across the entire moveable lid from lash line to the crease. This shade sets the base, brightens the eye, and provides a clean surface for the subsequent shades to sit on.
Mid-tone: the crease
Switch to your fluffy blending brush. Pick up a shade one to two tones deeper than your lid color — a warm taupe, soft brown, or dusty mauve are universally flattering starting points. Tap off the excess.
Place the brush at the outer corner of the crease and work in windshield-wiper strokes back and forth along the socket line. The goal is a gradual gradient, darker at the outer edge and fading toward the inner corner. Work with a light hand; you can always add more depth, but removing it requires clean blending.
Dark shade: the outer corner
Load the flat shader or pencil brush with the darkest shade in your palette. Apply it in a small V shape at the outer corner of the eye — on the outer third of the lid and pulling slightly up into the crease. This "outer V" creates depth, makes the eye appear more elongated, and anchors the look.
After placing the dark shade, switch back to the fluffy blending brush (clean or loaded with a small amount of the mid-tone) and soften the edges where the dark shade meets the mid-tone. The transition should be gradual, not a hard line.
Inner corner highlight
Load the pencil brush with the lightest, most luminous shade in your palette — a pale champagne, white shimmer, or soft pink. Dab it into the inner corner of the eye (the small triangular space near the nose). This brightens the eye, makes it appear more awake, and ties the look together.
Step 4: Adapt to Your Eye Shape
Placement — where you put color, not how you blend it — is what separates a look that flatters from one that disappears. The technique above stays the same; what changes is the geography.
Almond eyes
The most versatile eye shape. The standard three-shade placement works without modification. Accentuate with a graduated depth from the lash line up to the socket line, transitioning to a highlight on the brow bone. A classic outer-V dark shade and inner-corner highlight make almond eyes especially striking.
Hooded eyes
Hooded eyes have a fold of skin that covers part — sometimes most — of the moveable lid when the eye is open. The primary rule: apply shadow with your eyes open so you can see what remains visible. Work the crease shade slightly above your natural socket line — sometimes a full centimeter above it. If you place color only in the actual crease, it disappears under the hood when you open your eye.
Additional tips for hooded eyes:
- Keep the lid itself light (darker lid shades make hooded eyes appear heavier and smaller)
- Concentrate depth at the outer corner and blend upward and outward to create lift
- Curl your lashes — the hood often pushes lashes straight down; curling creates the illusion of a more open eye
- A nude or skin-tone shade on the lid, with all the depth in the blended-out crease, is one of the most effective hooded-eye formulas
Monolid eyes
Monolid eyes have no visible crease. This provides a large, open canvas. Apply darker shades at the base of the lash line, graduating to lighter shades as you move upward toward the brow. You can create the illusion of a crease by sweeping a mid-tone in a windshield-wiper motion above where a crease would be. Apply shadow with eyes open to ensure placement lands where it will be visible.
Deep-set eyes
Deep-set eyes appear recessed because the brow bone protrudes. Lighter shades on the lid bring the eye forward; avoid placing dark shades directly on the lid, which increases the appearance of depth. Concentrate mid-tones just above the crease, and use a bright highlight on the brow bone to counteract the shadow the brow bone naturally casts.
Downturned eyes
The outer corners tilt downward. Counterbalance by sweeping the mid-tone and outer-corner dark shade upward — almost toward the tail of the brow — instead of following the natural downward angle of the eye. Avoid extending dark color below the lower lash line at the outer corner, which emphasizes the downturn.
Step 5: Eyeshadow Textures — What to Know
Eyeshadow comes in several formulas, each with different application techniques.
| Texture | Best Applied With | Notes |
|---|---|---|
| Pressed powder | Brushes | Most beginner-friendly; forgiving and blendable |
| Loose pigment | Flat shader brush, damp | High intensity; more fallout; harder to control |
| Cream/mousse | Fingers or flat brush | Blends quickly; set with powder to prevent creasing |
| Liquid/foil | Fingers or flat brush | Intense metallic finish; limited blendability; apply fast |
Beginner recommendation: Start with pressed powder palettes. They are the most forgiving format, the most blendable, and the easiest to correct if placement goes wrong.
Step 6: Finishing Touches
Lower lash line
Use the pencil brush to run a soft line of the mid-tone or dark shade along the outer two-thirds of the lower lash line. This grounds the look and creates a more cohesive eye. Avoid lining the full lower lash line with a very dark shade on small eyes — it makes them appear smaller.
Mascara
Apply mascara after eyeshadow to avoid fallout landing on freshly applied mascara. Curl lashes before mascara. One to two coats of mascara on the upper lashes completes most looks; a single coat on lower lashes adds definition without heaviness.
Setting spray (optional)
A light mist of setting spray over the finished eye locks shadow in place and prevents fallout throughout the day. Hold the bottle at arm's length and mist once across the face.
Common Beginner Mistakes
Skipping primer. The single reason most eyeshadow looks fail before noon. Five seconds of primer application extends wear for hours.
Using too much product at once. Eyeshadow is buildable. Start with less than you think you need and layer.
Circular blending motions. Back-and-forth windshield-wiper strokes are the correct technique for the crease. Circular motions blend all the colors together into an indistinct muddy smear.
Placing color in exactly the wrong spot. Particularly for hooded eyes: shadow placed only in the natural crease disappears entirely when the eye opens. Always check in a mirror with eyes fully open.
Ignoring the inner corner. A touch of highlight in the inner corner immediately brightens the eye and makes the whole look more polished.
Using only dark shades. New makeup wearers often reach for dark colors for drama, but placing dark shade across the entire lid creates a heavy, closed-off eye. Depth is most effective when it is concentrated at the outer corner and crease, with light on the lid.
Eye Cosmetic Safety
The FDA regulates which pigments and color additives are approved for use in the eye area. Certain pigments approved for general cosmetic use are not approved for eye-area products. When shopping for eyeshadow, choose products from reputable brands that declare color additives on the label.
Specifically:
- Avoid kohl, kajal, or surma products from unregulated markets. Traditional kohl products often contain high levels of lead salts; the FDA has flagged these as illegal color additives and banned them from cosmetics sold in the US. There are reports of kohl products linked to lead poisoning, particularly in children.
- Check expiry dates and replace products regularly. Old eye products can harbor bacteria; cream and liquid formulas are particularly susceptible.
- Do not share brushes or applicators to prevent bacterial transfer.
- Remove eye makeup completely before sleep to prevent irritation and possible infection.
See the eye-makeup hub for further guidance on safe eye cosmetic practices.
Quick Reference: The Beginner Sequence
- Prime lids (finger application, 20–30 seconds to set)
- Optional: dust translucent powder over primer for smoother blending
- Pack light base shade across full lid with flat shader brush
- Blend mid-tone into crease with fluffy brush, windshield-wiper strokes
- Apply dark shade to outer V with flat shader or pencil brush
- Blend crease/outer-V transition with fluffy brush
- Highlight inner corner with pencil brush
- Optional: define lower lash line with pencil brush + mid-tone or dark shade
- Curl lashes and apply mascara
- Optional: setting spray to lock
Step by step
- 1
Prime your lids
Dispense a pea-sized amount of eye primer onto your ring finger and pat it from the lash line to the brow bone. Allow 20–30 seconds to set. Primer prevents creasing, extends wear time, and makes colors appear more vivid. If you do not have primer, a small amount of long-wear concealer works as a substitute.
- 2
Set the primer (optional but recommended)
Lightly dust a neutral matte eyeshadow or translucent powder over the primed lid with a clean fluffy brush. This dries down the primer surface and creates a smoother base for blending, especially helpful for beginners.
- 3
Apply a light base shade across the lid
Load a flat shader brush with the lightest shade in your palette (close to your skin tone or one shade lighter). Press and pat it across the entire moveable lid from lash line to the crease. This sets the base and provides a clean surface for subsequent shades.
- 4
Blend a mid-tone into the crease
Switch to your fluffy blending brush and pick up a mid-tone shade (one to two tones deeper than the lid color). Tap off excess. Work it along the crease in windshield-wiper strokes — back and forth — concentrating color toward the outer corner and fading toward the inner corner. Build gradually with a light hand.
- 5
Define the outer corner with a dark shade
Load the flat shader or pencil brush with the darkest shade in your palette. Apply it in a small V shape at the outer corner of the eye — covering the outer third of the lid and pulling slightly up into the crease. This adds depth and elongates the eye.
- 6
Blend the transition
Use your fluffy blending brush (clean or lightly loaded with the mid-tone) to soften the edge where the dark shade meets the mid-tone. The transition should be gradual — no hard lines. Check in a mirror with eyes fully open, especially if you have hooded eyes, to ensure color placement is visible.
- 7
Highlight the inner corner
Load a small pencil brush with the lightest or most luminous shade in your palette (champagne, white shimmer, or pale pink). Dab it into the inner corner of the eye. This brightens the eye and ties the look together.
- 8
Define the lower lash line (optional)
Use the pencil brush to run a soft line of the mid-tone or dark shade along the outer two-thirds of the lower lash line. Avoid lining the entire lower lash line with a very dark shade on smaller eyes, as this reduces the appearance of eye size.
- 9
Curl lashes and apply mascara
Apply mascara after eyeshadow is complete to avoid shadow fallout on fresh mascara. Curl lashes first, then apply one to two coats of mascara to the upper lashes.
- 10
Set with setting spray (optional)
Mist a setting spray at arm's length across the finished eye to lock shadow in place and prevent fallout or fading throughout the day.
Products that fit this guide
Picked by code from each product's full ingredient list.

Catrice
Brow Fix Shaping Wax
brow product · 1 g · 11 ingredients
- Fragrance-free
- No essential oils
Catrice
Drunk'n Diamonds Eyeshadow Stick
eyeshadow · 2.5 g · 17 ingredients
- Fragrance-free
- No essential oils
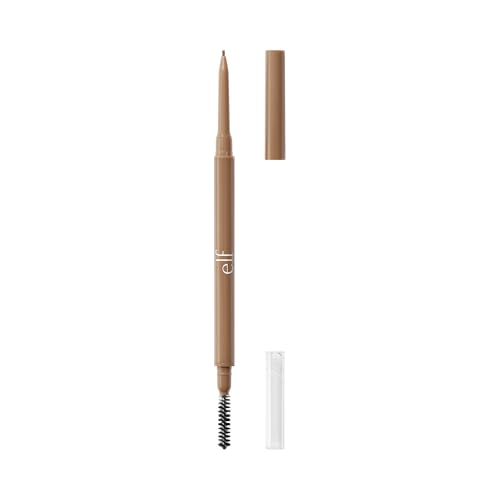
e.l.f.
Micro-Fine Brow Pencil
brow product · 0.03 g · 16 ingredients
£7.75−3%Amazon UK
- Fragrance-free
- No essential oils
- With vitamin E

Essence
All Eyes On Me Waterproof Mascara
mascara · 8 ml · 20 ingredients
- Fragrance-free
- No essential oils
- With glycerin
Amazon UK prices as of 6 November 2026, 04:30 GMT; Amazon sets the final price at checkout.
Frequently asked questions
Is eyeshadow technique still worth learning in 2026, or is there an easier shortcut?
Technique remains the most transferable skill — the right brush, the right stroke direction, and correct primer use will make any palette perform better than jumping between products. Pre-blended palette formulas (transition shades, duo-chrome toppers) have become more sophisticated, but the foundational sequence — prime, base, crease, depth, blend — has not changed and takes most beginners fewer than two weeks of practice to execute consistently.
Why does my eyeshadow crease and disappear within an hour?
The most common cause is skipping eye primer or not allowing it to set before applying shadow. Oily lids break down powder formulas quickly; primer creates a barrier. If you are using primer and still experiencing creasing, try setting it with a very light dusting of translucent or matching powder before applying shadow. Cream eyeshadow applied without being set with powder creases particularly fast.
What is the correct blending motion for eyeshadow?
Windshield-wiper strokes — side to side — along the crease, using a dome-shaped fluffy blending brush. Circular motions drag all the colors together into a muddy blend. Back-and-forth strokes diffuse the edge of the shadow while keeping the pigment concentrated where you placed it.
How do I apply eyeshadow if I have hooded eyes?
Apply your crease and mid-tone shades slightly above your natural socket line — often a full centimeter higher — so the color remains visible when your eye is open. Do all your application with eyes open and check in a mirror frequently. Keep the lid shade light. Concentrate depth at the outer corner and blend upward. Curl lashes to counteract the hood pushing lashes straight.
Do I need an expensive palette to learn eyeshadow?
No. Formula quality matters more than brand price. Look for pressed-powder palettes that feel smooth and buttery when swatched — chalky, dry formulas are difficult to blend regardless of price. Many affordable drugstore palettes in the $10–$20 range have excellent blendability. Start with a neutral palette (taupes, browns, champagne) that covers the light/mid-tone/dark structure before exploring color.
Is it safe to use craft or body glitter as eyeshadow?
No. Craft glitter and body glitter are not formulated or tested for the eye area. The FDA only approves specific pigments and color additives for use in the area of the eye, and cosmetic-grade glitters intended for the eye area use finely milled particles specifically sized to minimize irritation risk. Using craft glitter near the eye carries a real risk of corneal scratching and infection.
Sources
- 01Eye Cosmetic Safety — U.S. Food & Drug Administration (FDA). The FDA regulates which color additives are approved for eye-area use; certain pigments approved for general cosmetic use are not approved near the eye; kohl/kajal are illegal color additives under US law.
- 02Kohl, Kajal, Al-Kahal, Surma: By Any Name, Beware of Lead Poisoning — U.S. Food & Drug Administration (FDA). Kohl consists of salts of heavy metals including lead; the FDA has linked kohl use to lead poisoning in children and considers it an illegal color additive in cosmetics sold in the US.
- 03Why You Should Use Eyeshadow Primer — Makeup.com by L'Oréal. Eye primer prevents creasing and fading, creates a smooth base, and significantly extends eyeshadow wear time by keeping natural oils at bay.
- 04How to Apply Eyeshadow for Your Eye Shape — Makeup.com by L'Oréal. Placement adaptation by eye shape is the key differentiator in eyeshadow technique: hooded eyes require crease placement above the natural socket line; monolids benefit from a gradient from lash line to brow; almond eyes are the most versatile shape.
- 05The Best Cut Crease Eye Makeup Tutorial for Hooded Eyes — Makeup.com by L'Oréal. For hooded eyes, applying the crease shade slightly above the natural socket line and doing makeup with eyes open are the two key technique modifications; an eye primer formulated with a tacky texture prevents transfer on minimal-crease-space lids.
- 0610 Eyeshadow Tips Everyone Should Know — Makeup.com by L'Oréal. Common beginner eyeshadow errors include skipping primer, over-applying product in one pass, and failing to use the correct brush motion for blending.