How to Apply Liquid Eyeliner: A Step-by-Step Guide
The short answer
Rest your elbow on a surface, look down into a mirror, use the dot-and-connect method.
Why Liquid Eyeliner Is Hard — and How to Make It Easy
Liquid eyeliner intimidates beginners because its formula dries quickly, offers no forgiveness once set, and responds immediately to any hand movement. The learning curve is real, but it is entirely about technique, not talent. Most difficulties trace to one of three errors: an unstable hand position, looking up (which distorts the canvas), or attempting one unbroken line.
Fix the position and method, and the line straightens. This guide covers exactly that.
Choosing the Right Applicator
Before technique, applicator choice matters.
Felt-tip liner (recommended for beginners): A firm nib that behaves like a pen. It dispenses formula consistently at any angle and prevents overloading. Tip width determines line weight — a 0.1–0.3 mm nib for fine lines, a wider nib for bold work. Felt-tips are significantly more forgiving than loose-brush liners.
Fine-brush liquid liner (recommended once confident): A thin, tapered brush attached to a bottle of liquid formula. Offers the most precision for custom line weights and extremely sharp wings, but requires consistent pressure control. A stiffer, shorter brush is more controlled than a long floppy one — if a brush liner gives you trouble, try a brand with a firmer, shorter bristle configuration.
Avoid starting with:
- Long, very flexible brushes (amplifies hand tremor)
- Very watery formulas (run before setting)
- Applicators you've never used before a high-stakes occasion
The Right Physical Setup
Mirror Position
This is the most-overlooked factor. Most bathroom mirrors are wall-mounted above eye level. Looking up into a mirror pulls the upper eyelid up, stretching the skin taut — the line looks clean in that position, then crinkles and looks uneven when the eye returns to its natural resting position. Place your mirror flat or at counter level and look down into it. The natural downward gaze lets you see the lash line clearly and draw on skin in its relaxed state.
Elbow Position
Rest your drawing elbow on a table, counter, or your own knee. This eliminates the free-hanging arm tremor that is the primary cause of wavy lines. Hold the liner close to the tip (as you would a pen for fine writing, not a wand).
The Pinky Anchor
Plant your pinky on your cheekbone. This second stabilisation point creates a human brace that dramatically reduces fine motor variation.
The Dot-and-Connect Method (Core Technique)
Rather than drawing a single line from inner to outer corner — the technique almost no professional actually uses for precision liner — work in segments:
- Place dots or small dashes at the lash base: start one-third in from the inner corner and work outward, placing marks at the root of the lashes rather than above them.
- Connect the segments with short strokes, working from one dot to the next.
- Refine and fill any gaps with a final pass.
This method means that a hand slip ruins one short segment, not the entire line. You can also close your eye gently and run the liner tip along the lash roots from below, which some people find eliminates the need for precise placement from the inner to outer corner all at once.
Common Liner Mistakes and How to Fix Them
| Mistake | Cause | Fix |
|---|---|---|
| Wobbly, uneven line | Unsupported hand, single long stroke | Elbow on surface, dot-and-connect method |
| Line sits above lashes | Starting too high | Begin at lash root, not above it |
| Liner creases by midday | No primer, oily lids | Apply eyeshadow primer first |
| Transfer to upper brow bone | Liner not set before blinking | Keep eye open 30 seconds after application |
| Wing angles downward | Drawing in downward arc | Use tape guide; draw wing toward tail of brow |
| Inner corner looks thick/closed | Liner starts too far inward | Begin one-third in from inner corner |
| Liner smudges throughout day | Formula not waterproof + humidity | Switch to waterproof formula + primer |
How to Do a Thin, Clean Line
A thin line suits most everyday looks, smaller eyes, and anyone who wants subtle definition rather than drama.
- Use a fine-nib applicator (0.1–0.3 mm felt-tip or a very fine brush)
- Apply minimal pressure — let the product flow; pressing hard makes the line thicker
- Stay as close to the lash roots as possible; a line even 1 mm above the lashes looks thicker than intended
- One pass is usually enough; a second pass thickens the line
How to Add a Wing
A winged liner (also called flicked liner) extends past the outer corner of the eye at an upward angle.
The wing angle: The classical rule is to imagine a line extending from your lower lash line outward and upward — the wing follows that angle. For eyes that tilt downward at the outer corners, angle the wing more steeply upward to lift the appearance. For eyes that tilt upward, a shallower angle maintains harmony.
The tape method: Cut a small piece of tape and angle it from the outer corner of the eye toward the tail of your brow. Draw your wing against the tape edge, let it dry, then peel the tape away for a perfectly clean line. Masking tape or medical tape is gentler on skin than regular tape.
The connect method: Draw the wing line first (extending past the outer corner and upward), then draw the actual lash-line liner, and finally fill in the triangle between them. This decouples the wing angle decision from the precision of the lash-line stroke.
For eye-shape–specific wing advice, see the dedicated cat-eye tutorial.
Correcting Mistakes
Even professionals correct their liner. The technique is:
- Immediately (within 60 seconds): Clean up with a dry fine-pointed cotton swab. Liquid liner removes much more easily before it fully sets.
- Once dry: Dip a fine cotton swab in micellar water and use the tip to sharpen edges. One precise stroke of a damp swab can clean an uneven wing edge to a sharp line.
- Wing too short? Extend it — liquid liner layers well over itself once dry.
- Asymmetry between eyes? Adjust the shorter or less angled wing to match the longer one; it is almost always faster than removing the longer one.
Removing Liquid Liner
Waterproof liquid liners require an oil-based or micellar remover — water alone won't touch most film-forming polymer formulas. Apply remover on a cotton pad, press it against the closed eye for 15–20 seconds to dissolve the product, then wipe gently. Rubbing vigorously on the thin eyelid skin contributes to long-term damage and premature fine lines — always press, then gentle sweep, rather than scrubbing.
For a full guide on the other eyeliner formats — pencil, gel, and felt-tip — see eyeliner types guide.
Step by step
- 1
Prep the lid with primer
Apply a thin layer of eyeshadow primer or a swipe of translucent powder along the upper lid. This removes excess oil, creates a dry surface for the liner to grip, and extends wear by several hours. Skip this step and most liquid liners will crease or fade by midday.
- 2
Set up your position
Place a mirror flat on a table or at counter height — not a wall mirror you look up into. Sit or stand so you can look down into the mirror at approximately a 45-degree angle. Rest your drawing elbow firmly on the table. Grip the liner like a pen, close to the tip.
- 3
Anchor your hand
Rest your pinky (little finger) of the drawing hand on your cheekbone. This creates a physical brace that reduces hand tremor significantly. If needed, use your non-drawing hand to gently pull the outer corner of the eyelid slightly sideways (toward your temple) to create a taut, smooth canvas.
- 4
Place dots along the lash line
Starting roughly one-third of the way in from the inner corner (not all the way at the inner corner — this can make eyes look smaller), place a series of small dots or dashes directly at the base of the upper lashes, as close to the lash roots as possible. Work outward to just past the outer corner.
- 5
Connect the dots with short strokes
Go back over the dots with short connecting strokes, not one long sweep. Stroke from dot to dot, building the line in small controlled segments. The direction should generally move from inner to outer corner. This creates a smoother, more even line than attempting a single stroke.
- 6
Build thickness if desired
For a thicker liner look, go back over the line with additional passes, keeping all strokes at the lash base. Adding thickness upward (away from the lash line) can work for dramatic looks but is more forgiving than trying to thicken the line at the inner corner, which can close the eye.
- 7
Add a wing (optional)
To add a wing: use a small piece of tape or a business card angled from the outer corner of your eye toward the tail of your brow as a guide — draw the wing line along that edge, then fill in the triangle between the wing and the end of your lash line. Alternatively, draw the wing freehand by extending the lower lash line upward at a gentle angle, then connect it back to the upper lash line.
- 8
Let dry fully before opening eye
Keep the eye gently open (don't squeeze it shut — this transfers liner to the lower lid) for 20–30 seconds until the liner has set completely. Liquid liner that is touched before fully dry will smear, dent, or transfer.
- 9
Correct mistakes
Dip a fine-pointed cotton swab in micellar water or a dedicated eye-makeup remover and clean up any uneven edges, smudges, or wing asymmetry. Work precisely — a pointed swab tip can sharpen a messy wing to a clean edge. Liquid liner is much easier to correct before it fully oxidises (within the first minute), so correct quickly.
Products that fit this guide
Picked by code from each product's full ingredient list.

Catrice
Brow Fix Shaping Wax
brow product · 1 g · 11 ingredients
- Fragrance-free
- No essential oils

Catrice
Drunk'n Diamonds Eyeshadow Stick
eyeshadow · 2.5 g · 17 ingredients
- Fragrance-free
- No essential oils
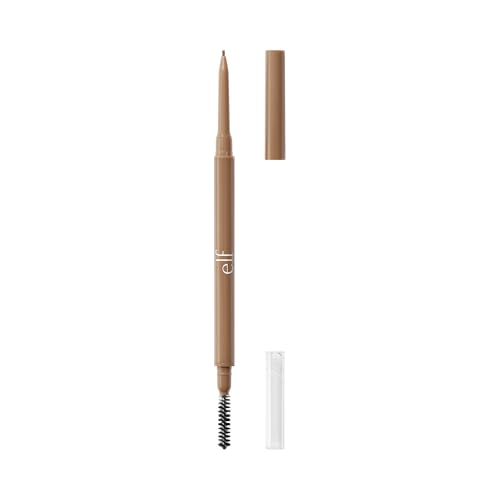
e.l.f.
Micro-Fine Brow Pencil
brow product · 0.03 g · 16 ingredients
- Fragrance-free
- No essential oils
- With vitamin E

Essence
All Eyes On Me Waterproof Mascara
mascara · 8 ml · 20 ingredients
- Fragrance-free
- No essential oils
- With glycerin
Frequently asked questions
Why does my liquid eyeliner always come out wobbly?
The two most common causes are an unsupported drawing arm and an unsteady single-stroke technique. Fix both: rest your elbow on a hard surface, anchor your pinky on your cheekbone, and use the dot-and-connect method (place dots along the lash line, then connect them with short strokes) instead of a single continuous sweep. Looking down into a mirror at counter height rather than up into a wall mirror also helps — looking up changes the skin tension, making the line look clean while you draw but distorted when your eye relaxes.
Should I use a felt-tip or brush liquid liner?
Felt-tip liners are significantly easier for beginners and intermediate users — the firm nib provides consistent resistance and prevents overloading. Brush applicator liners give the highest possible precision for custom line weights and very sharp wings, but require more hand steadiness and pressure control. Learn on a felt-tip, then upgrade to a brush applicator if you want even finer control.
How do I stop liquid liner from smudging during the day?
Three factors help: apply an eyeshadow primer to the lid before liner (creates a dry, oil-free base); choose a waterproof formula with film-forming polymers; and set the liner with a matching eyeshadow or translucent powder immediately after it dries. Let liner dry fully (20–30 seconds) before blinking. Also avoid touching the eye area once liner is applied.
Is it easier to draw eyeliner with eyes open or closed?
For the upper lash line: most people find it easiest to keep the eye open, look down into a mirror, and draw along the lash line from above. Closing the eye creates a flat surface but makes it harder to see where the lashes actually start. Some people find gently closing the eye and drawing along the roots from below (the tightline-adjacent technique) works well. Experiment with both — the key is whatever gives you the clearest view of the lash base.
How do I make both wings match?
Start with the eye you find harder to control (usually the non-dominant side). Draw that wing first, then match it on the dominant side — this is the reverse of the natural impulse. For symmetry, step back from the mirror frequently and check both eyes simultaneously at a normal viewing distance. The tape guide method (tape angled from outer corner to brow tail) ensures identical wing angles without freehand guessing.
Sources
- 01Eye Cosmetic Safety — U.S. Food and Drug Administration (FDA). FDA guidance on safe use of eye cosmetics, including not sharing applicators, replacing products regularly, and using only products approved for the eye area.
- 02TFOS Lifestyle: Impact of cosmetics on the ocular surface — PubMed Central / Tear Film and Ocular Surface Society. Eye cosmetics including liquid liner migrate onto the ocular surface; all eye cosmetic application is associated with changes in tear break-up time; letting liner set before blinking reduces migration.
- 03Marginal Eyeliner Use and Meibomian Gland Function — PubMed Central / PMC. Inner lash-margin eyeliner application causes significantly greater tear-film contamination than outer-lash-line application; liquid liner should not be applied directly to the waterline due to migration risk.